Introduction to Quarkus
As a Full stack developer, I always enjoyed developing Angular applications, since it is incredibly easy to create new apps using the Angular CLI, develop new features or modify existing ones using the live development environment and I always thought... Why something similar is not available for Java development?
After some research, I found Quarkus and after reading about all the improvements it brings performance wise next to the promised great developer experience, I immediately decided to give it a shot.
In this series of articles, I will share my experience with Quarkus and execute performance and load tests to see if Quarkus lives up to the high expectation it drew in my mind.
Setting up a development environment
Quarkus provides good documentation for getting started (https://quarkus.io/get-started/). My laptops operating system is Windows 11, so using the PowerShell to run the next 2 command was enough to add the Quarkus CLI including all needed dependencies. No previous Java setup was required!
iex "& { $(iwr https://ps.jbang.dev) } trust add https://repo1.maven.org/maven2/io/quarkus/quarkus-cli/"
iex "& { $(iwr https://ps.jbang.dev) } app install --fresh --force quarkus@quarkusio"
After running the previous commands, restarting PowerShell was needed to be able to use the Quarkus CLI.
I was already starting to get impressed with what I saw! Let's go further...
Creating the first project
Within the PowerShell, navigate to the folder where you want to create the new project, afterwards run the following commands:
quarkus create

cd code-with-quarkus
This will first create a project named "code-with-quarkus" and cd into the new folder. Next we want to run this project. Let's run the following:
quarkus devYou will notice that Maven installs the necessary dependencies and then your applications starts with live reload:
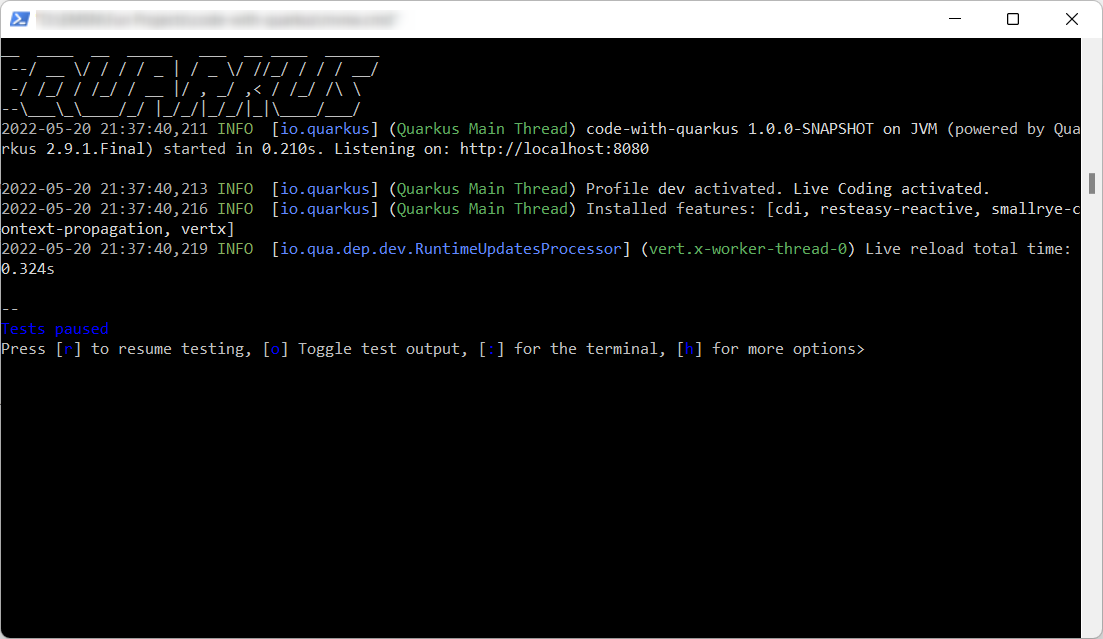
And the Quarkus application is now running at localhost:8080!
The development environment
Let's type localhost:8080 in the browser and see what happens:
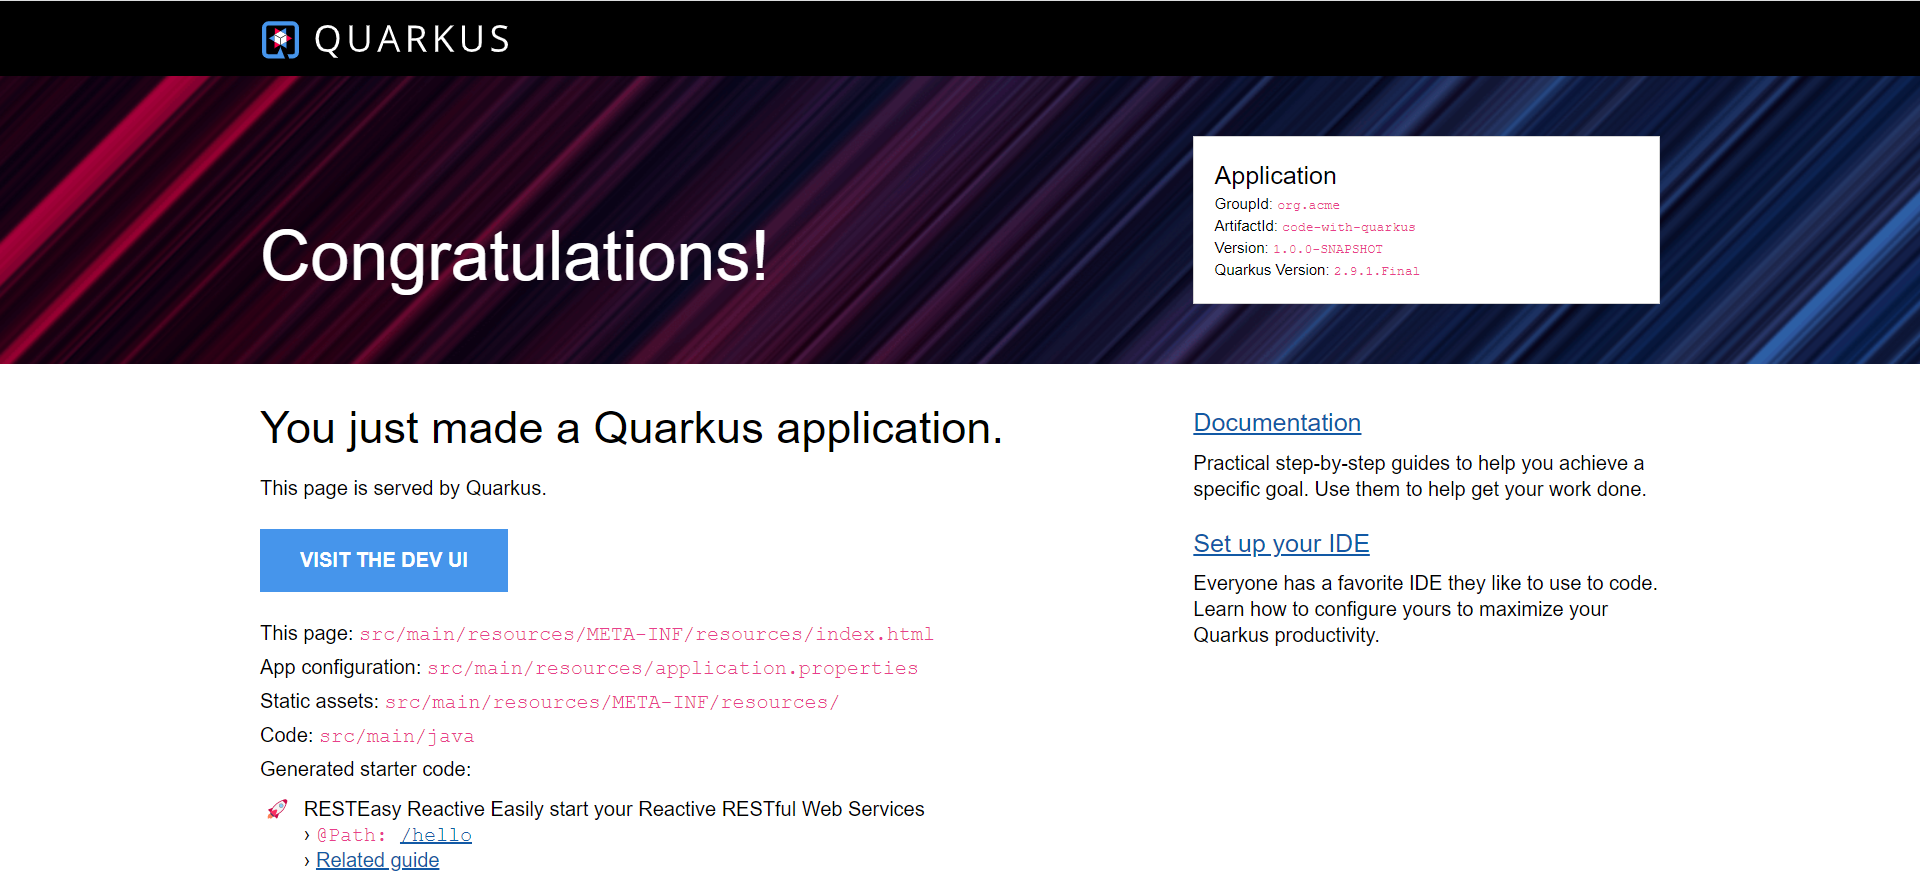
We can see that our application is running now. Using this user interface, we can see details like the artifact definition, configuration file and served source code. The most import part of this page is the DEV UI button. Let's click on it:

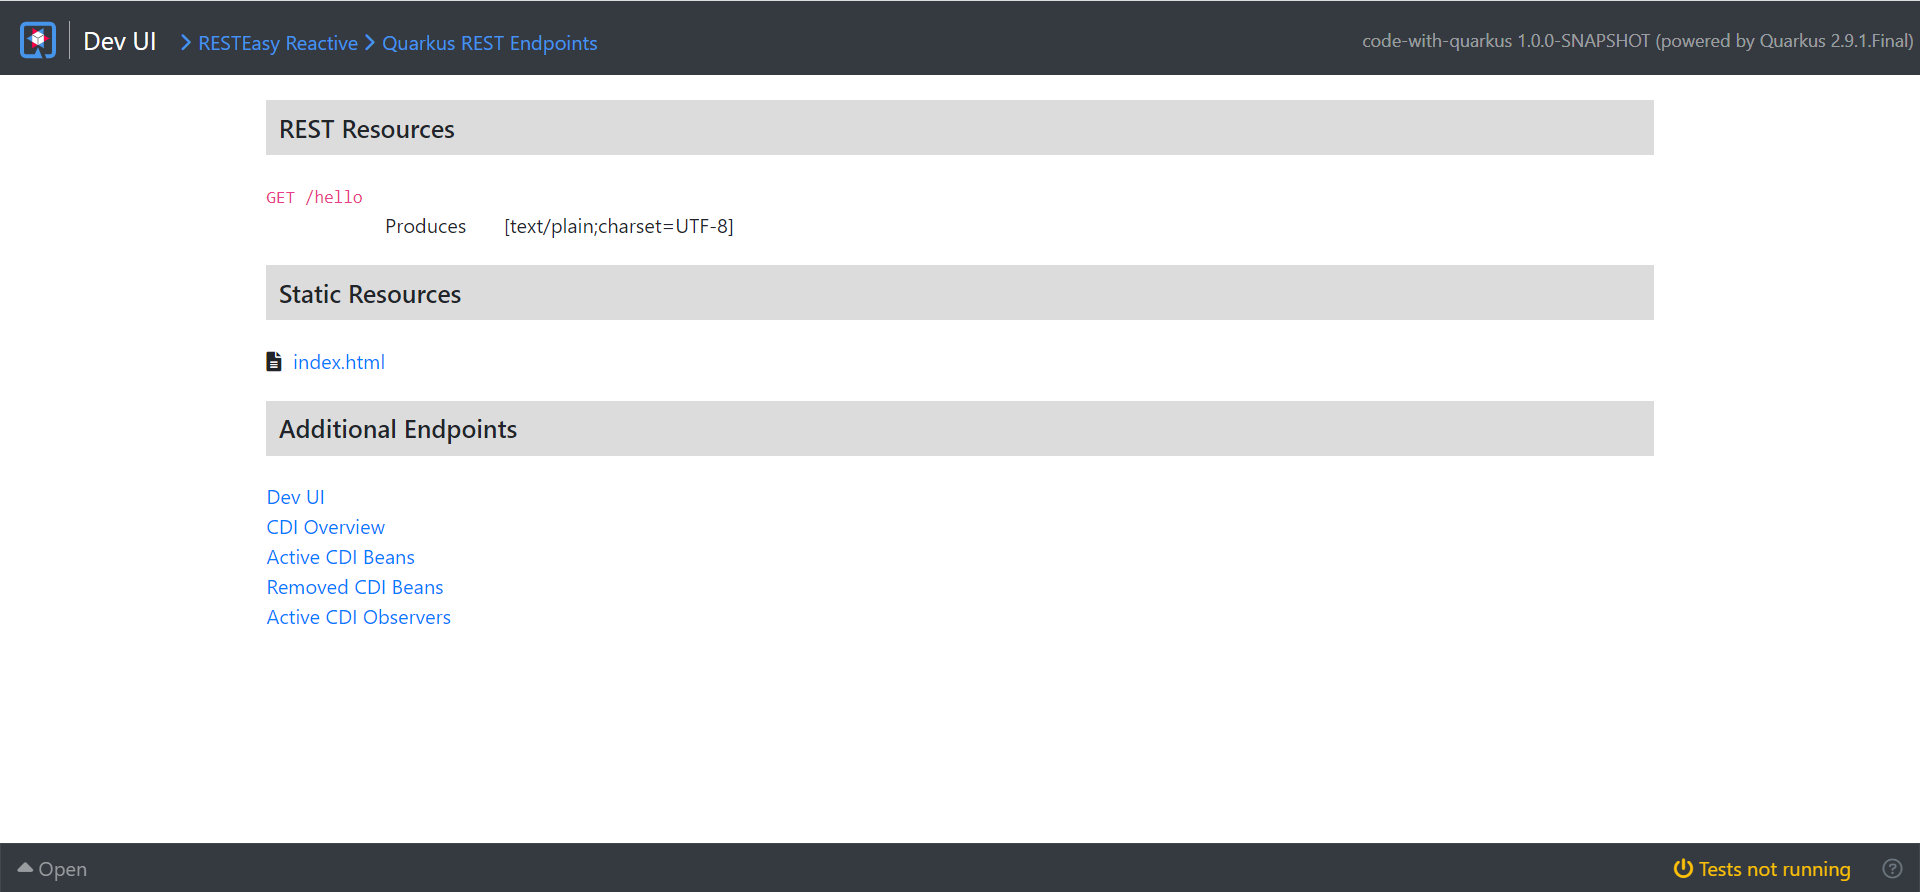
From this page, we can see everything related to our app. We can edit the configuration directly, check the injected Java beans, check the available endpoints, etc... so it is kind of a very advanced version of the Swagger-UI/actuator that is usually used in Spring-boot applications.
Now let's see how the live reload works.
If we look at the list of endpoints available, we can see the following:
And since the /hello endpoint is a GET request, let's call it in the browser:

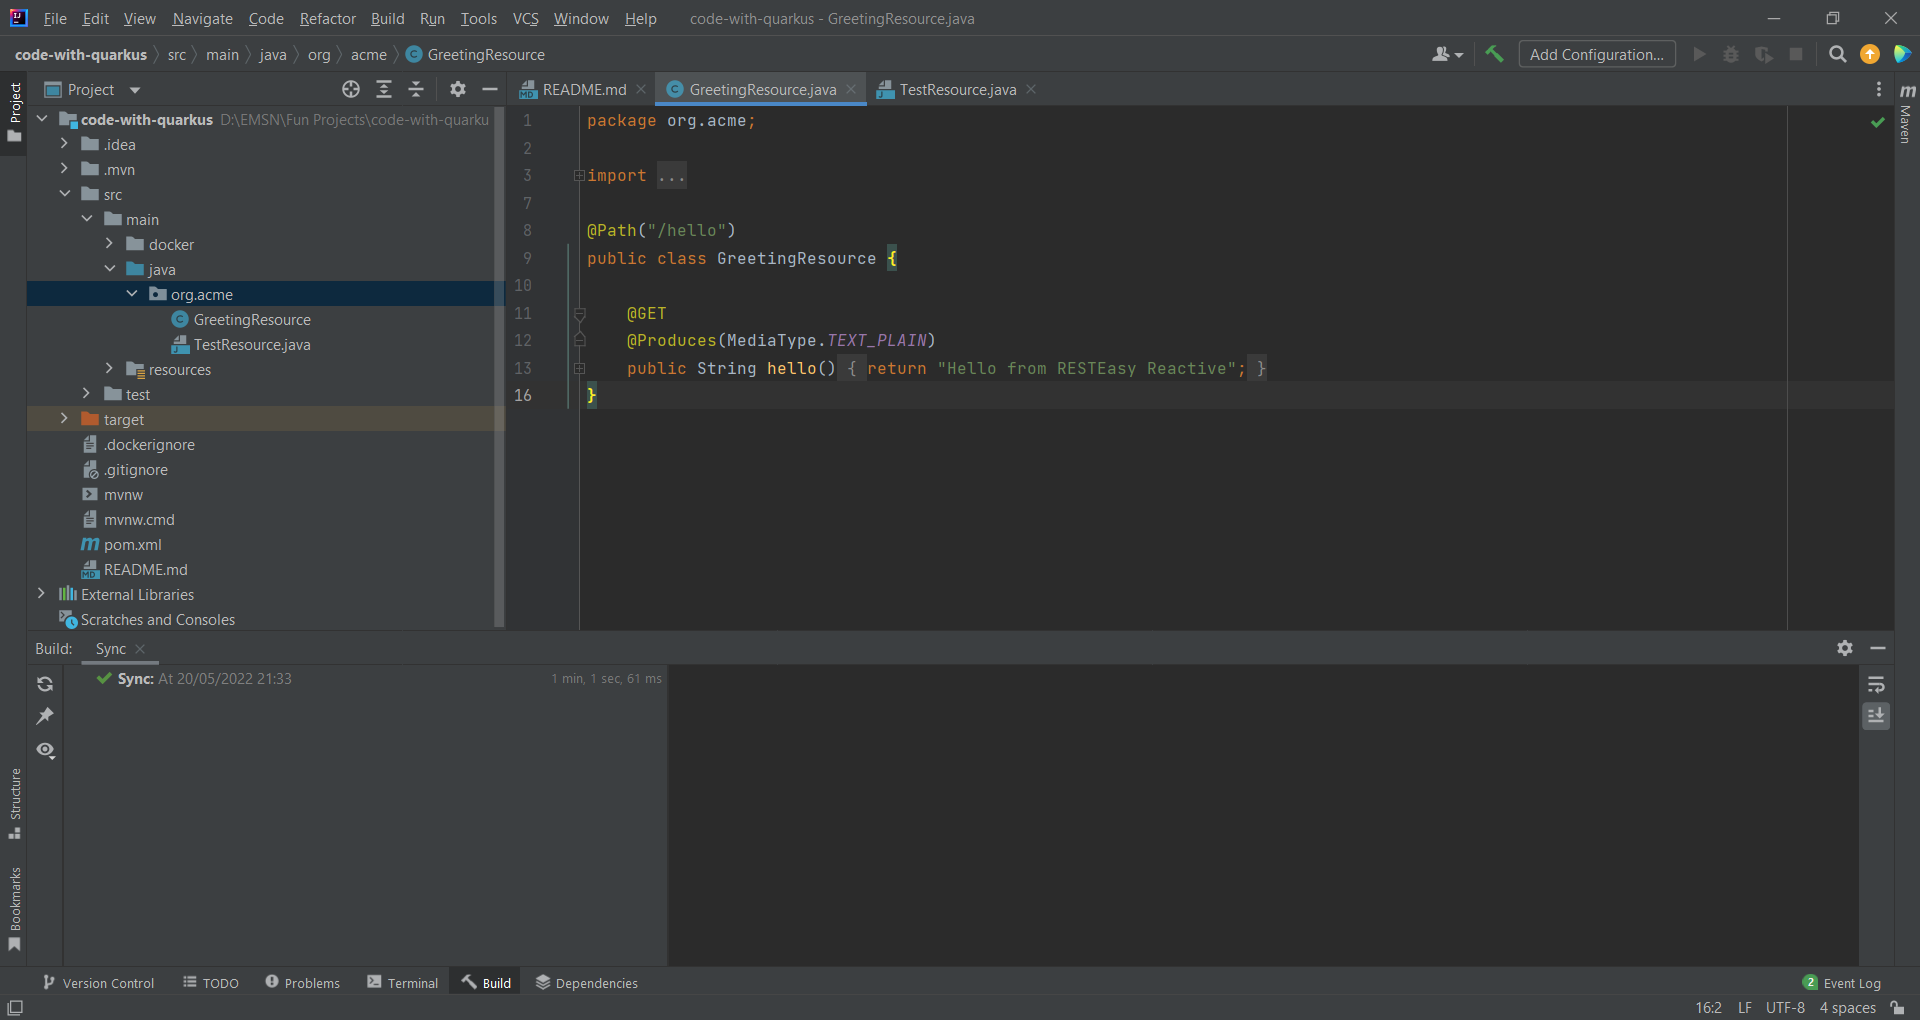
But what is the source code that generated this response? If we open the project in Intellij (or any other IDE) we can see the following code:
Let's change the response text and fire the request once again:
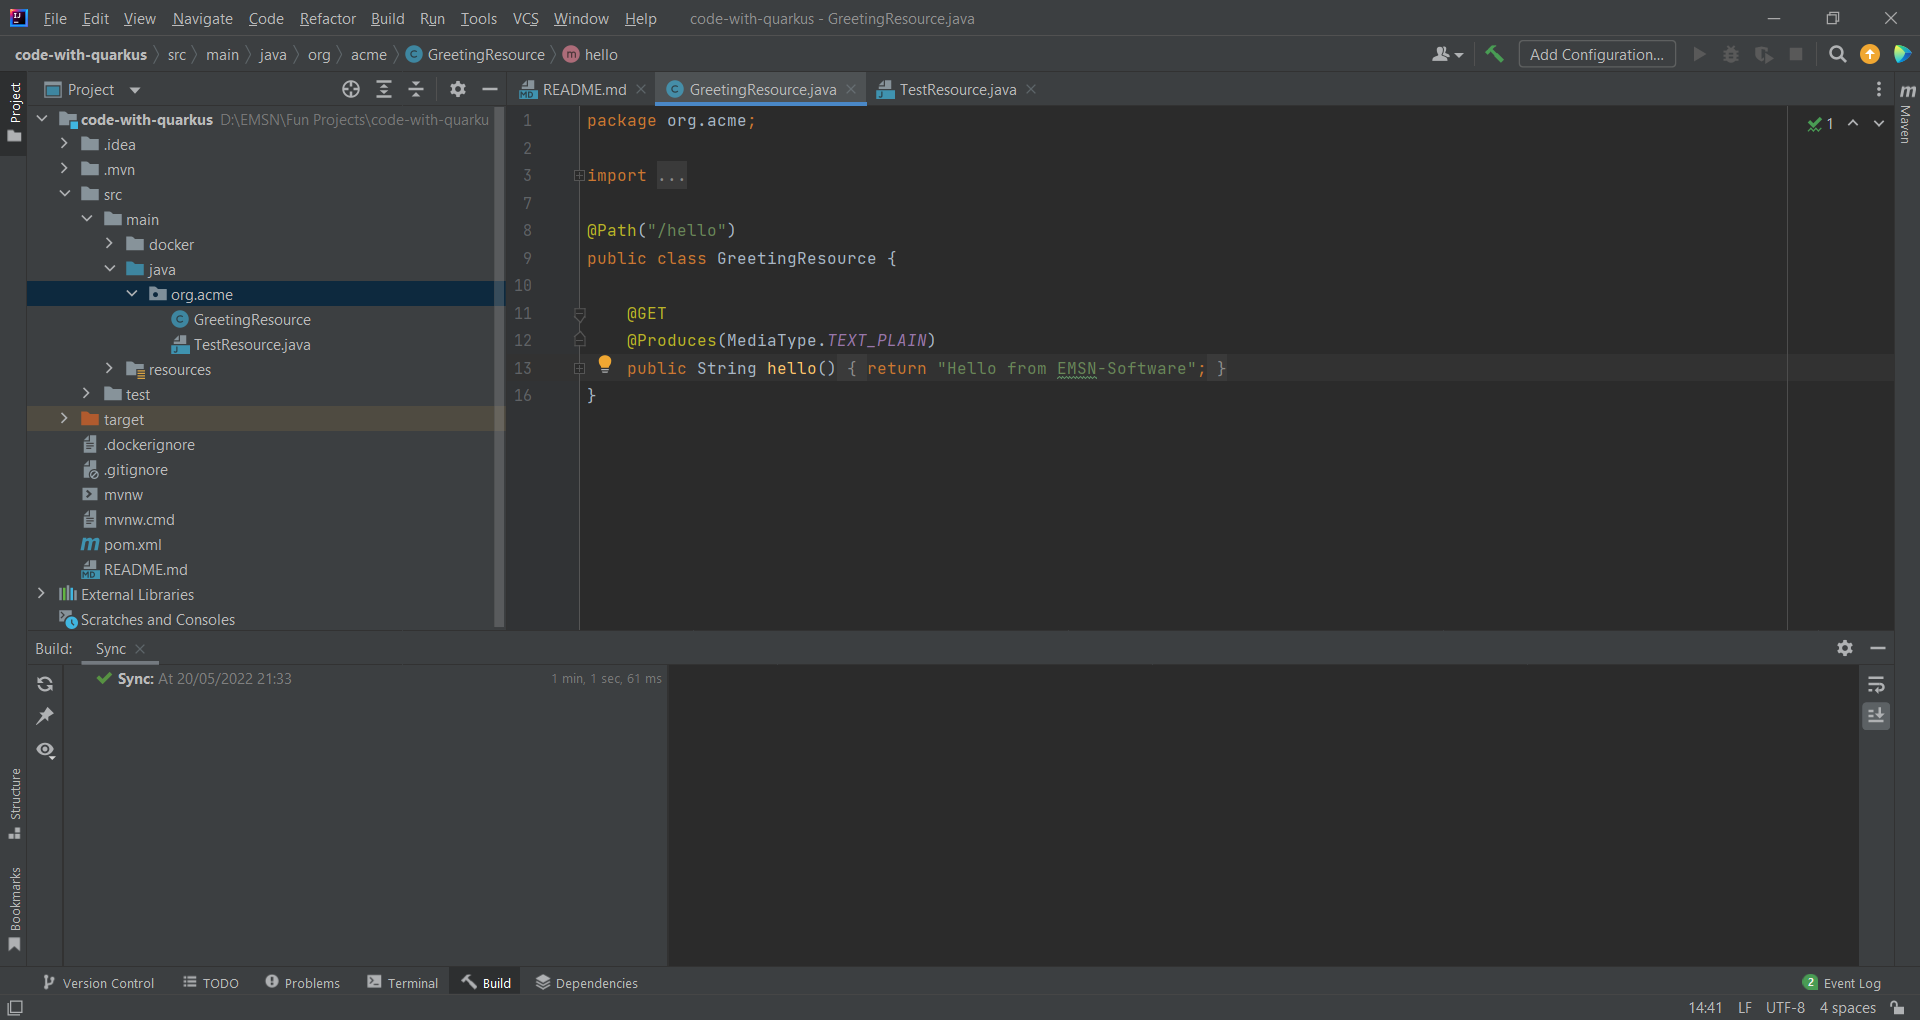
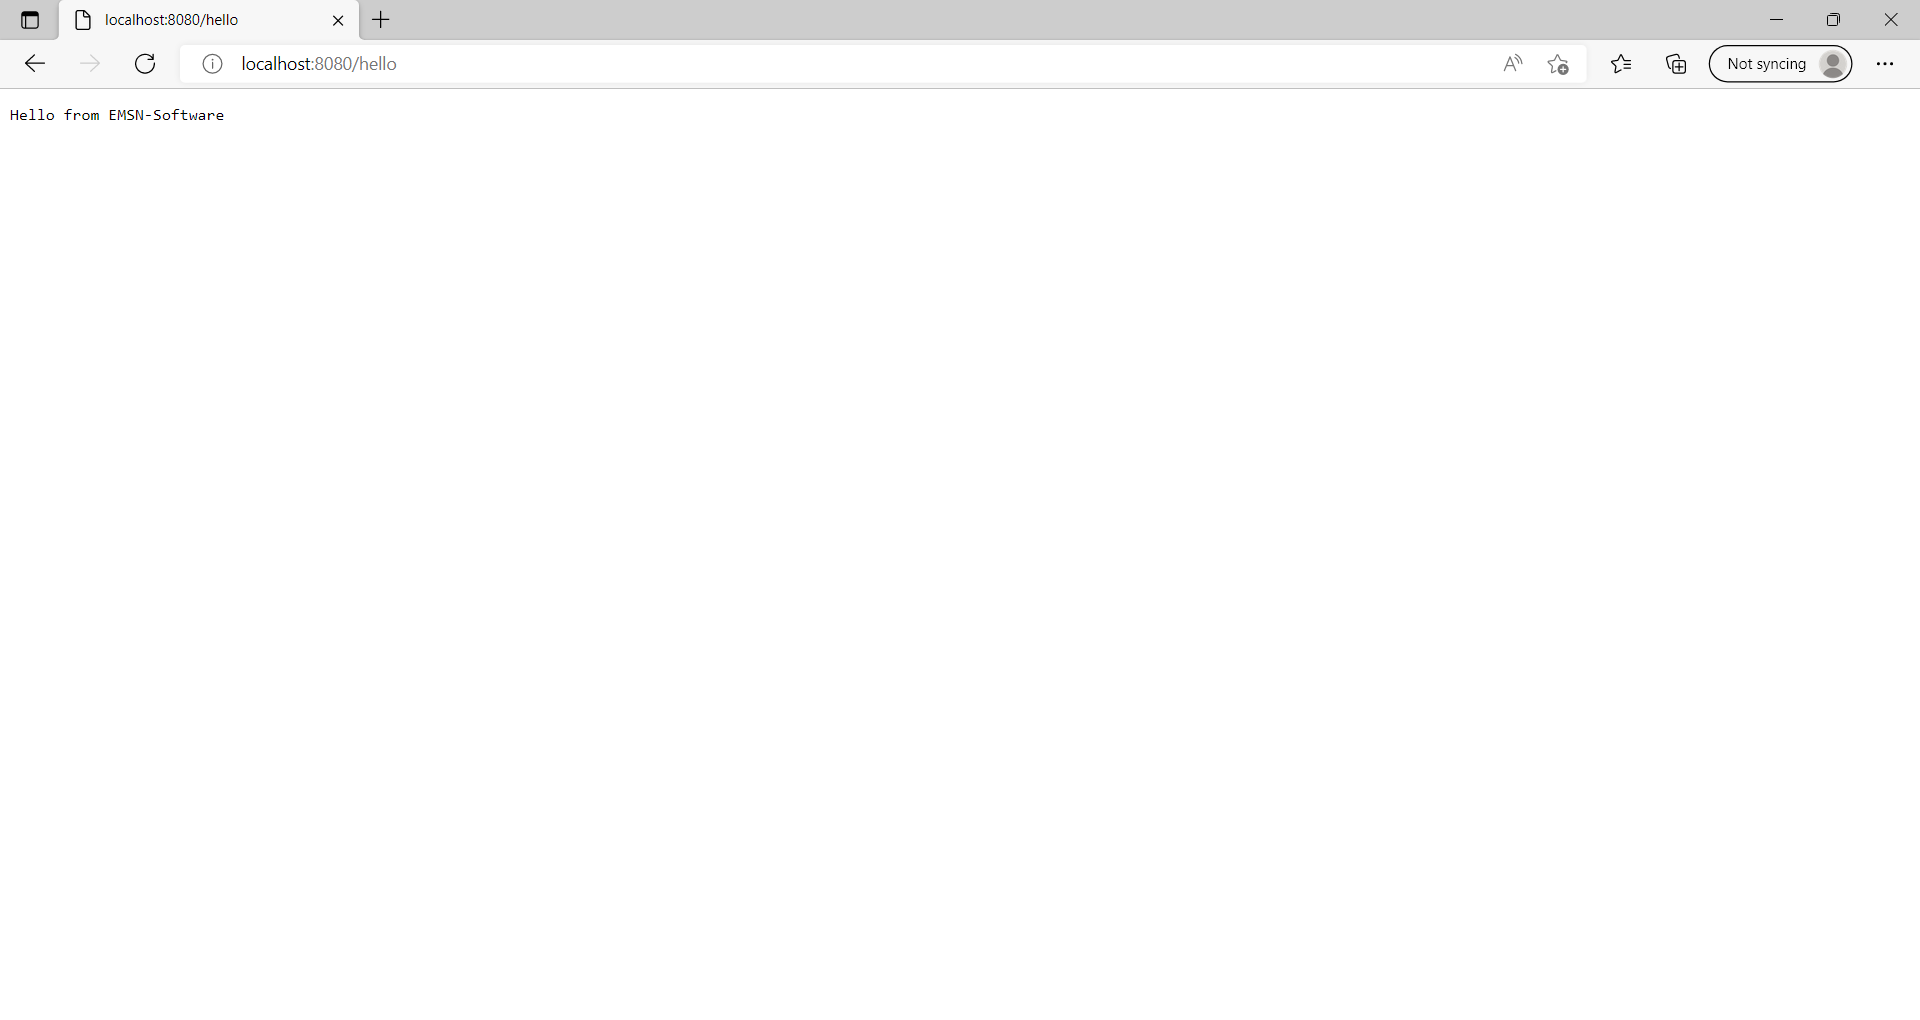
We can see that the response was immediately modified, no need to rebuild the project again! All thanks to the Quarkus live development environment.
Let's try something more advanced. I will create a new endpoint and see if that is added to the list of available endpoints, cause changing the response of an existing endpoint and loading that to the server does not look that difficult since an object of the resource was already available.
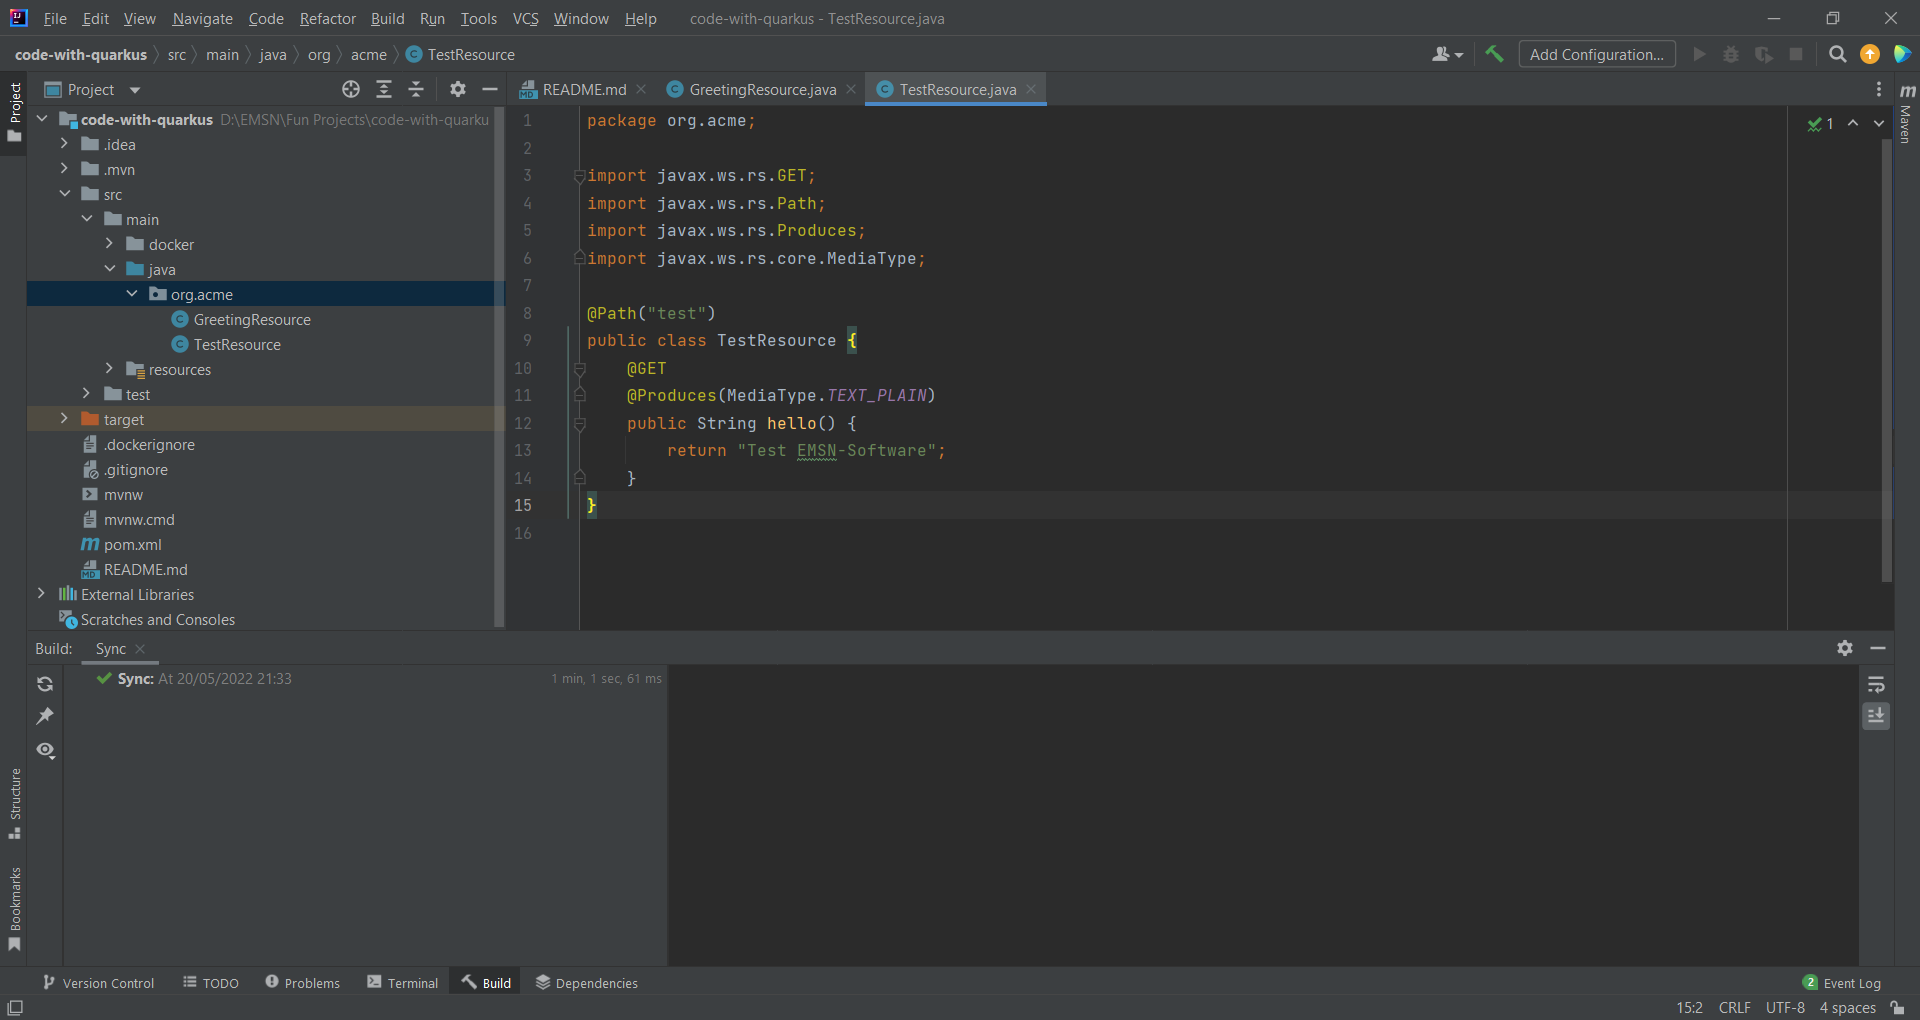
I created a new resource named TestResource which provides a GET request returning "Test EMSN-Software".
Let's check the dev UI:
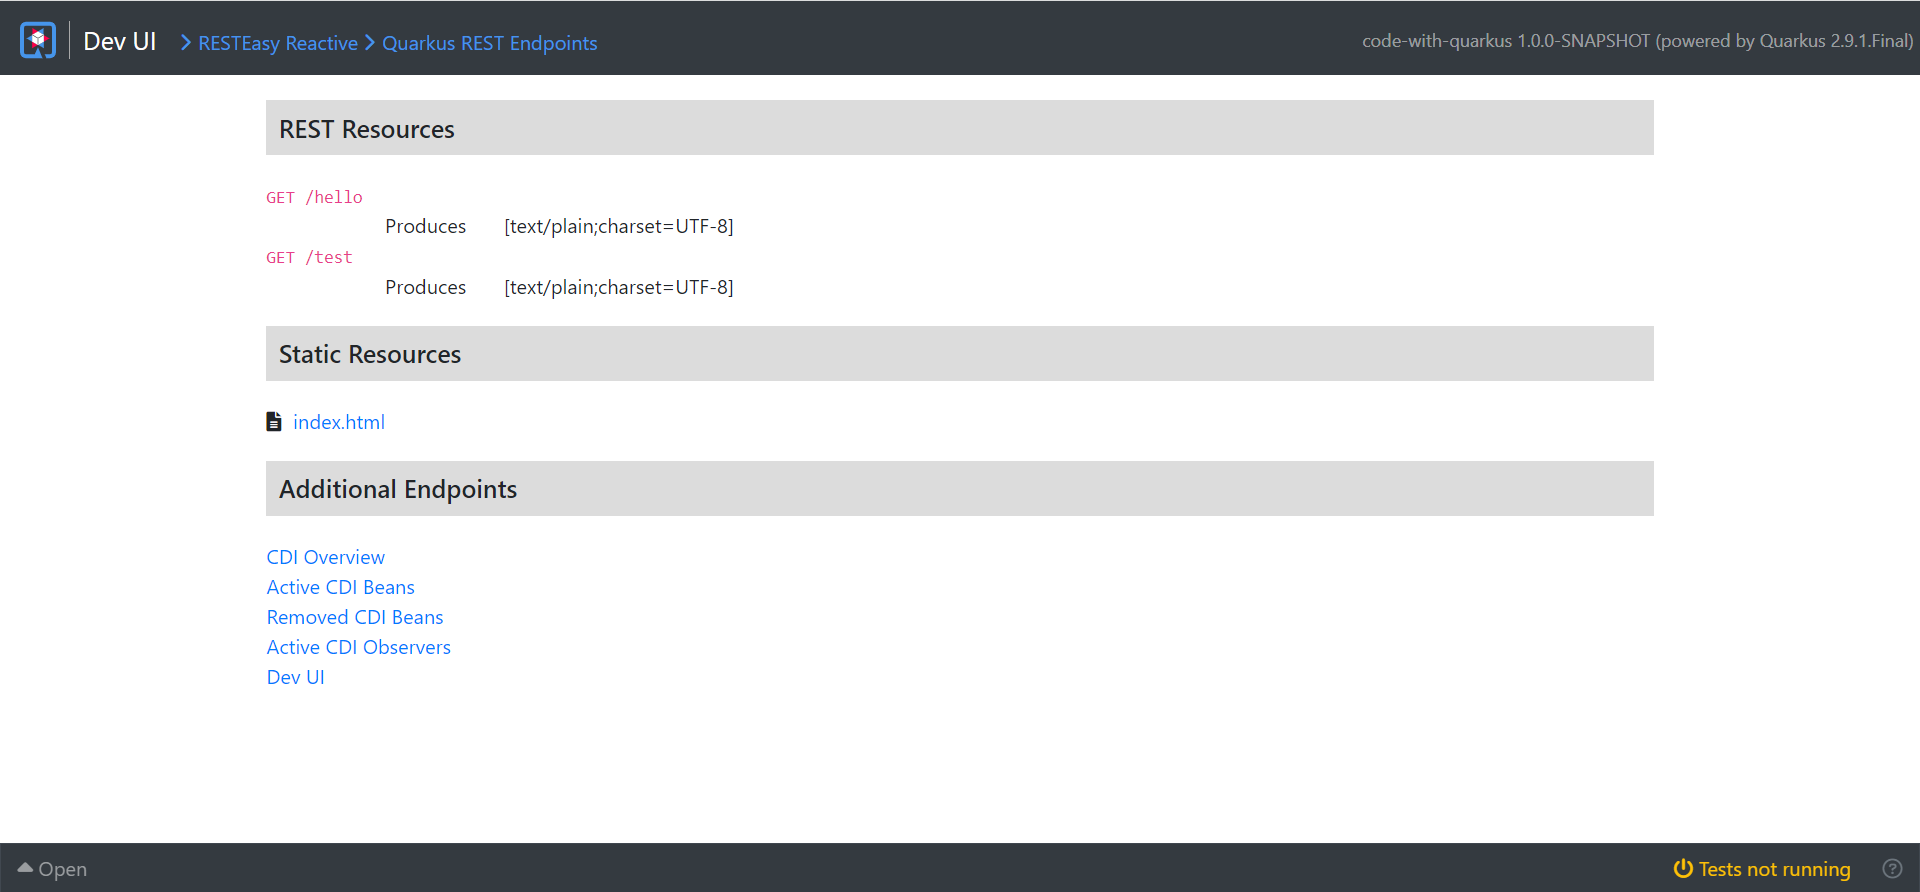
We can notice that the new /test endpoint was added to the list of available endpoints and if we fire a request to that endpoint we can see that the response is returned successfully thanks to the live development environment of Quarkus.

I can say that I am already impressed with the improvements Quarkus added to the Java development experience. Let's check other improvements like test easiness, building Docker images directly using the CLI, performance improvements and running Quarkus as a native application using GraalVM in other articles.
Thank you for reading my blog. Please make sure to check out the other Quarkus related articles by visiting the Quarkus section of my blog.